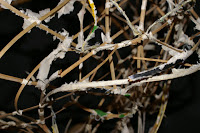
Looking at all the 140+ areas that needed attention meant keeping to a schedule of 25 repairs or so per week to stay on track with the time line Corey and I came up with for the project. Broken down that meant roughly one major repair (such as a strip replacement or a splint) and 5-7 minor repairs (such as tightening up joints) each session, 3-4 times per week.
Following are some examples of the types of repairs that needed to be made.
Before and after shots, with notes.
For some areas bamboo can be simply bent by working it into the desired shape by hand. However for tighter curves and/or sharper angles sometimes it is necessary to heat the strip with an open flame until it becomes more pliable.
Where there is a break in a bamboo strip but both ends are still touching a splint can be made. This consists of adding a piece behind the break and then securing it on both ends. A final step (not shown) is to wrap over the break as well to further secure the area.
Here you can see the vertical pieces had poked through their bindings and were sticking down below the rim. These loose joints caused the whole head to flop up and down on the rim so the bindings were replaced.
As you can see this corner had completely broken free of all the bindings. Each strip needed to be carefully measured against the opposite corner to keep symmetry in the head. A few of the strips needed to be replaced for other reasons as well.
The loop of rattan through which the string that controls the lion's ears and eyes runs was broken in two and "repaired" rather crudely with electrical tape. My solution was to bend a thick wire into the proper shape to eliminate the possibility of a replacement developing a similar break.
Hopefully this gives a good overview of some of the types of repairs that needed to be made to this lion. Working on it certainly has given me a much better understanding of the design and function of each piece. I was also able to compare this frame to a couple of frames from other builders and it was very enlightening to see how different craftspeople approached and solved similar issues in different ways.
Stay tuned: Bring on the Paper!
Where there is a break in a bamboo strip but both ends are still touching a splint can be made. This consists of adding a piece behind the break and then securing it on both ends. A final step (not shown) is to wrap over the break as well to further secure the area.
Here you can see the vertical pieces had poked through their bindings and were sticking down below the rim. These loose joints caused the whole head to flop up and down on the rim so the bindings were replaced.
This section on the back had three strips with splits (the two verticals and the diagonal). These are strategic pieces so rather than just splint them I opted to completely replace them. I had to untie each joint where the pieces intersected another strip and carefully measure out an exact duplicate before binding the new strip in place. This was quite time-consuming but the renewed strength is worth the effort.
As you can see this corner had completely broken free of all the bindings. Each strip needed to be carefully measured against the opposite corner to keep symmetry in the head. A few of the strips needed to be replaced for other reasons as well.
This is the top of the left eyebrow ridge. A whole section of the upper strip is missing and a broken support strut can be seen in the background. I replaced both with new bamboo strips.
In a few places the bamboo strips were still good but had simply come loose from their bindings. Marking their location and rebinding was a very quick and easy fix.
The loop of rattan through which the string that controls the lion's ears and eyes runs was broken in two and "repaired" rather crudely with electrical tape. My solution was to bend a thick wire into the proper shape to eliminate the possibility of a replacement developing a similar break.
Hopefully this gives a good overview of some of the types of repairs that needed to be made to this lion. Working on it certainly has given me a much better understanding of the design and function of each piece. I was also able to compare this frame to a couple of frames from other builders and it was very enlightening to see how different craftspeople approached and solved similar issues in different ways.
A shot of the repaired and cleaned framework.
Stay tuned: Bring on the Paper!


No comments:
Post a Comment